|
|
|
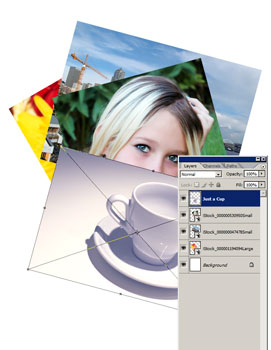
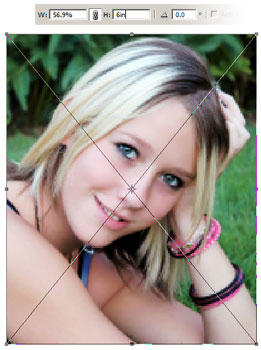 Transform controls activated when image is placed. 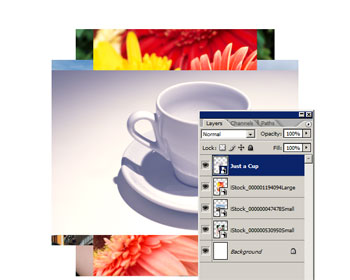 Four images placed. Each image appears in its own layer as a Smart Layer.
 Add a Drop Shadow and Border 6. Select the layer with the image on the bottom of the stack and add a Drop Shadow layer style (Layer> Layer Style> Drop Shadow). Adjust the settings to achieve your desired drop shadow.
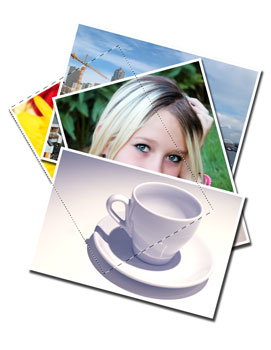
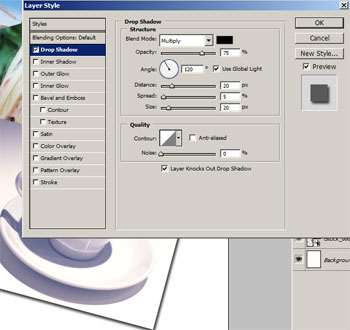 Adding a drop shadow layer style. 7. In the same Layer Style window, select the Stroke style. You should see the properties where you can adjust the stroke. Change the Position to "Inside" and the Color to white then adjust the size to create the border. Click OK when done. 8. Right mouse click on the layer we've added the layer style to and select "Copy Layer Style". Then select the layer above, right mouse click and select "Paste Layer Style". Repeat this for the other layers so that all the layers (except the background layer) have the same layer style. 9. To make the drop shadows look more realistic, double-click on the layer style icon of each layer and modify the drop shadow. Increase the distance of the drop shadow according to the layer order. For example, my document has 4 layers. I left the distance of the drop shadow on the first layer to 20. But I increased the distance by 5 as the layer order increases: 2nd layer: 20px 3rd layer: 25px 4th layer: 30px 5th layer: 35px  Editing the drop shadow distance. 10. Your document should look similar to this with a white border and drop shadow on each of the images.  White borders and drop shadows applied. Make it Glossy After adding a white trim and a drop shadow to the images, we're finally able to add the glossy texture.
 Selection of the layer created. 12. Set white as the foreground color. You can easily do this by pressing D to reset the foreground and background to the default colors then pressing X to switch the foreground and background color.
13. Add a Gradient Fill layer (Layer> New Fill Layer> Gradient Fill). This should appear above the selected layer and the layer mask of the Gradient Fill layer should have the layers shape as its layer mask. 14. A Gradient Fill window will appear. In the window, change the Gradient to Foreground to Transparent, style to radial, and scale to 150%. Uncheck and check the Align with Layer checkbox to see which effect you like more.  Editing the Gradient Fill layer. 15. Repeat the previous steps to create a gradient fill layer for the rest of the layers.  Gradient Fill layer added for each Smart Object layer. 16. Activate the Elliptical Marquee tool and create a selection with a bulge. You may need to zoom out (Ctrl+-) to get enough room to draw the selection. 17. With the Elliptical Marquee tool still activated, move the selection so that it covers about half of the top image. Select the layer mask of the top Gradient Fill layer and press delete. 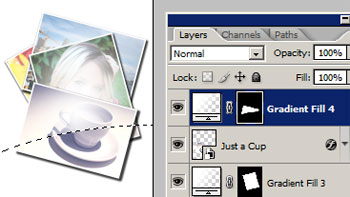 Selected area deleted from layer mask 18. Repeat the previous two steps for the rest of the layer masks.  Final Results The background color was changed to a 50% gray. To do this, simply activate the background layer and press Shift+Backspace. Select 50% gray and click OK. 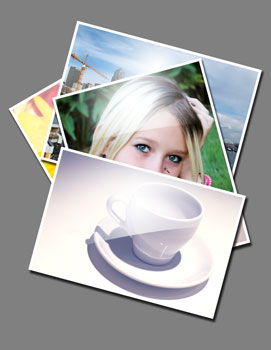

|
Archive : 21st February 2007 - Starburst glints of light, 22nd February 2007 - Glossy Photos , 23rd February 2007 - Four Way Fire , 24th February 2007 - Aging a woman’s face, 25th February 2007 - Raining Effect , 26th February 2007 - Make a photo to a statue , 27th February 2007 - Making a Web Photo Gallery, 28th February 2007 - Colorization from Black and white photo |
|
|
|||||||||||||||