25th February 2007 Photoshop Tutorial- Rain Effect
Step 1
Today we’re going to attempt to create a simplistic yet realistic rainy day. This is basically a beginner tutorial, and my first attempt at writing one, so stay with me here.
We're going to try to reproduce the effect achieved in turning this image: 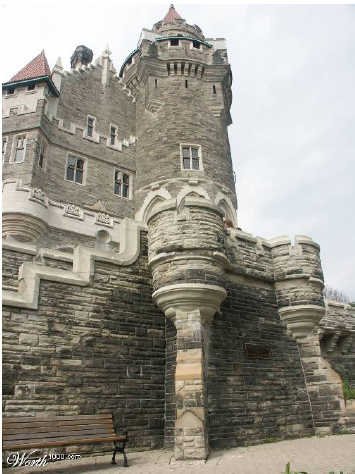
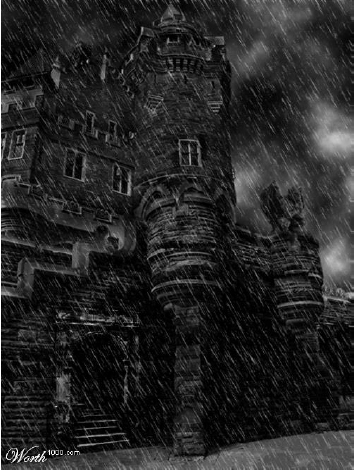
into this one:
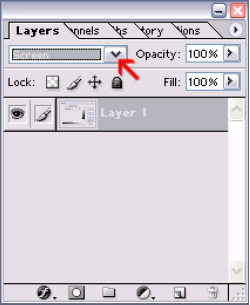
First thing you need to do is open the picture you want to add rain to. You can use any picture you want, or you can use the one provided. Next, duplicate the background layer (CTRL+J) by either dragging the layer to the “Create a New Layer” button at the bottom of the layers pallet OR going to Layer > Duplicate Layer…(this requires you to click “OK”).
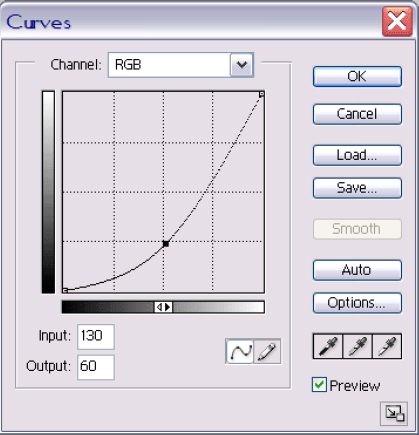
Here’s the fun part! On your “background layer copy” go to Image > Image Adjustments > Curves… (CTRL+M) and make your setting something like this:
Or you can play around with them to get the desired effect you want. This gives the image that “dark rainy day” appearance.
Step 2: The Rain
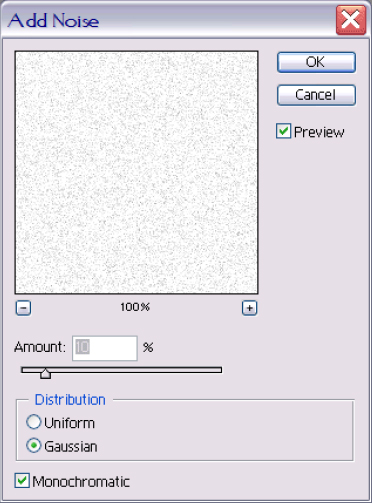
Next step, the rain! Create a new layer (Shift+CTRL+N) by clicking the “Create a New Layer” button  as before, OR go to Layer > New > Layer… name it “Rain” and fill that layer with White (CTRL+Backspace). Head up to Filter > Noise > Add Noise… and your settings should be close to this: as before, OR go to Layer > New > Layer… name it “Rain” and fill that layer with White (CTRL+Backspace). Head up to Filter > Noise > Add Noise… and your settings should be close to this:
Step 3 & 4
Then head over to Filter > Blur > Motion Blur… and the setting should be close to this:
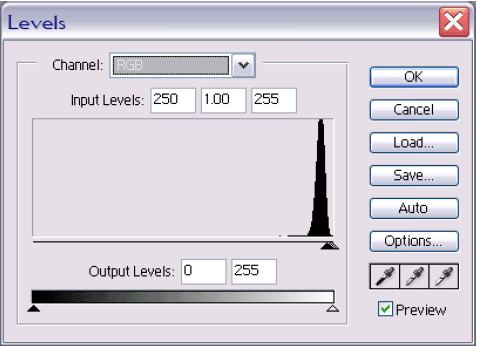
Now you need to head on over and adjust the levels. (CTRL+L) Go to Image > Image Adjustments > Levels… and my settings are:
Optional step! To double the amount of rain in your picture, just copy the “Rain” layer (CTRL+J) and press CTRL+T to pull up the transform handles. You can go to Edit > Free Transform… as well. Click just outside the bottom right handle, until the cursor looks bent. Then hold Shift and turn the layer clockwise until the bottom right corner becomes the top left corner. Then hit the “Commit” button at the
top!
Step 4
From what I’ve learned about the aging process, I know that while bones cease to grow, and in fact shrink, cartilage does continue to grow. As a result, the end of a nose may appear larger as a person grows older. So while I was still in the Liquify mode, I used the Push tool to extend the length of the nose slightly. Then I used the Bloat tool to also enlarge it slightly, being careful not lose the essential quality or character of the nose. Go too far and it may not look like Katie anymore.
|